WinGeom Tutorial 2 – Constructing an Equilateral Triangle
In the last Wingeom tutorial, we have learned about the Midline theorem and how to use the basic tools of Wingeom such as the point and segment. In this tutorial, we are going to construct an equilateral triangle by mimicking compass and straightedge construction. In doing the construction, we will learn how to use the circle tool, and how to delete (or strictly speaking, hide) objects.
- Double click the Wingeom icon to open the Wingeom window. If the tip window appears, click the Close button.
- Top open the drawing window, click the Window menu and then click 2-dim or press the F2 key on your keyboard. When the drawing window appears, click the Maximize button.
- To display the Wingeom drawing tools, click the Btns menu, then click Toolbar.
- First, we will construct two points which will be the centers of our circle. To construct the two points, select the segments option button on the toolbar, then right click two distinct places in the drawing window. Notice that letters A and B appear in your drawing window.
- To construct a circle with center A and passing through point B, select the circles option button in the tool bar, point at A, hold the left mouse button, slide the mouse pointer to B and then release the mouse button.
- Construct another circle with center B and passing through point A (refer to the previous step).
- To construct the intersection points of the two circles, click the Point menu, click Intersection and then click Circle-Circle.
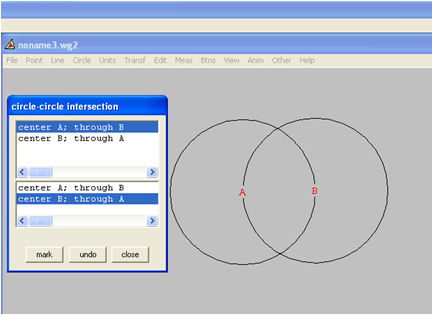
- In the circle-circle intersection dialog box (Figure 2), click the two circles that you want to intersect – the first circle in the first list box and the second circle in the second list box, then click the mark button. Wingeom will automatically name the intersection points C and D. Click the close button of the dialog box to close it.
- To draw the sides of the triangle ABC, select the segments button in the toolbar. To construct AB, point to A, hold down the left mouse button, slide the mouse pointer to B, and then release the mouse button. Now, construct sides BC and AC.
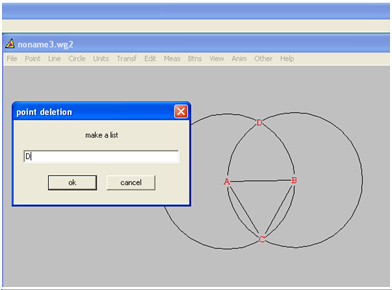
- We will now only need triangle ABC, so we will delete the two circles and point D. To delete point D, select the Edit menu, choose Delete and then select Point… to display the point deletion dialog box.
- In the point deletion dialog box, type D in the make a list text box and then click the ok button.
- To delete the two circles, select the Edit menu, choose Delete then choose Circle… to display the delete circle dialog box.
- Select the first circle with label center A; through B then click the delete button. Now, delete the other circle and close the delete circle dialog box.
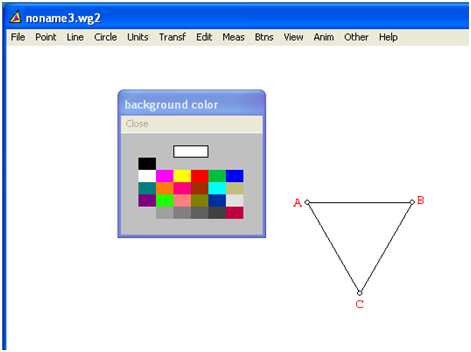
- Now, we will change our background color to white. Select the Other menu, choose Colors and then click Background form the sub-menu.
- In the background color dialog box, select the white rectangle from the color palette. This way, you can paste your work to word processors.
- Now, select the drag vertices button from the toolbar and drag the vertices of the triangle. What do you observe?
- Can you explain why your observation is such?
- To save your file, click the File menu, select Save.
- In the Save dialog box, choose the location of your file, type the file name in the File name box, then click the Save button.

Figure 1 – The Drawing Window and the Wingeom Toolbar.

Figure 2 – The circle-circle intersection dialog box.

Figure 3 – The point deletion dialog box.

Figure 4 – The color dialog box.