GeoGebra Tutorial 28 – Animation and Hypocycloids

This is the 28th tutorial of the GeoGebra Intermediate Tutorial Series. If this is your first time to use GeoGebra, you might want to read the GeoGebra Essentials Series.

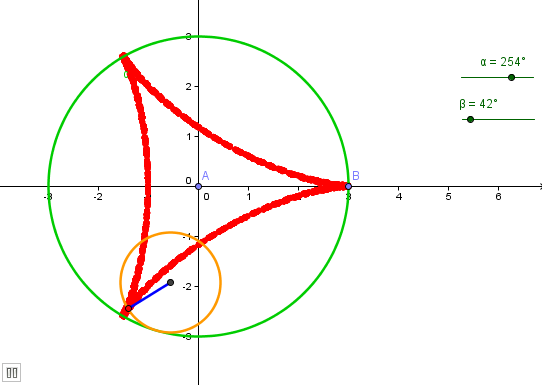
A hypocycloid is a special curve generated by the trace of a fixed point on a small circle that rolls within a larger circle. It is comparable to the cycloid but instead of the circle rolling along a line, it rolls within a circle.

In the tutorial below, menu commands, located in the menu bar, are in green bold text, and sub-menus are denoted by the > symbol. For example, Options>Labeling> New Points Only means, click the Options menu, choose Labeling from the list, then select New Points Only. The tool texts are colored orange. For example, New Point means the new point tool. Texts typed in the input box are colored blue. » Read more
Advanced GeoGebra Tutorial 4 – Constructing a Customized Tool I

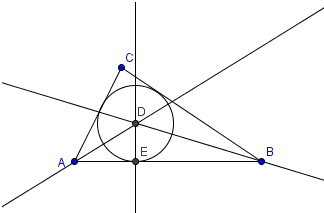
If we want to create a mathematical object (not included in the toolbar) many times, we may want to create our own tool.  This will save us the trouble of creating similar mathematical objects repeatedly.  In this example, we are going to create our own tool – the circumcircle of any triangle.  A circumcircle is a circle that passes through the three vertices of any triangle.

First we will construct a circumcircle of a triangle, and then we will use it to construct our customized tool. » Read more

GeoGebra Essentials 6 – Sliders and Rhombuses

This is the sixth tutorial in the GeoGebra Essentials Series. If you are not familiar with GeoGebra, you may want to read the Introduction to GeoGebra post and earlier tutorials. They contain the pre-requisites of this tutorial.

In the tutorial below, menu commands, located in the menu bar, are in brown bold text, and submenus are denoted by the > symbol. For example, Options>Labeling> New Points Only means, click the Options menu, choose Labeling from the list, then select New Points Only. The tool texts are colored orange. For example, New Pointmeans the new point tool.

In this tutorial, we construct a rhombus using the slider tool.  A slider (see figure below) is a dynamic graphical representation of a number.  We have three types of sliders – number, angle and integer.  The angle and number sliders are shown below. Slider s is the side length of the rhombus ABCB’. Slider t on the other hand is the measure of angle A.

In doing the tutorial, we  learn the following:

  • Use the tools we have discussed in previous tutorials – Segment tool, Parallel Line tool,and Intersect tool
  • Learn how to use new tools including Angle with Given Size and Segment with Given Length from Point . » Read more
1 2 3