How to Trim Youtube Videos Online
For teachers who are blogging, it is sometimes needed to just show a portion of a video or sometimes it is necessary to hide certain portions of a video. There are two ways to do this. First, you can permanently trim the video, and second, you can just hide show a certain portion without literally trimming.
In this tutorial, I am going to teach you how to literally trim. The word ‘trim’ in this tutorial, literally means to cut the unneeded portion of the video. Note that you can only do this if you are the one who uploaded the video. Once you do this, you cannot undo the process. Below are the steps in trimming a Youtube video.
How to Trim Youtube Videos
1.) Login to your Youtube account.
2.) After logging in, click your name (or the name of your channel) on the upper right part of page and click Video Manager.  3.) In the Video Manager page, select Uploads from the left side of the page. This will display all your uploaded videos. 4.) Now, click the Edit button near the video that you want to edit. 5.) In the Edit page, click the Enhancements menu.
  6.) Click the Trim button at the lower right part of the video. After clicking the Trim button, a trimmer window will appear at the bottom of the video (see next figure).
7.) Adjust the left and right trimmer (blue) to choose the part of the video you want to display. For example, if the video below is cut, it will only display from 16.7 seconds to 4 minutes and 2.6 seconds of the original video (click the image to enlarge). 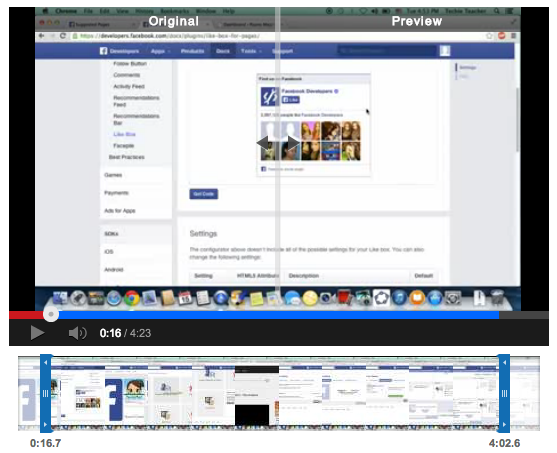 8.) Once you have chosen the part of the video, click the Done button. 9.) Click the Save button to finalize the trim.
Again, you must back up your video if you have to show some parts later. You cannot undo this process once it’s done.