GeoGebra Basic Construction 7 – Rhombus
This is the seventh tutorial in the GeoGebra Basic Construction Series. If you are not familiar with GeoGebra, you may want to read the Introduction to GeoGebra post and prior tutorials in the series. They contain the pre-requisites of this tutorial.
In the tutorial below, menu commands, located in the menu bar, are in green bold text, and submenus are denoted by the > symbol. For example, Options>Labeling> New Points Only means, click the Options menu, choose Labeling from the list, then select New Points Only. The tool texts are colored orange. For example, New Point means the new point tool.
In this tutorial, we construct a rhombus using a circle. Although, we have already discussed how to construct a rhombus, the method used in this construction is different. In this tutorial, we construct a rhombus mimicking compass and straightedge construction.

In doing the tutorial, we will use the following tools:
- Circle with Center through Point
- Parallel Line
- Intersect Two Objects
- Segment Between Two Points
Step by Step Instructions
| 1.) Open GeoGebra and select Geometry from the Perspective menu on the Sidebar. | |
| 2.) In this construction, we want all created points to have labels so that we can refer to them easily. To do this, select Options>Labeling> New Points Only from the menu bar. | |
| 3.) Select the Segment between Two Points tool and click two different points on the drawing pad to construct segment AB. | |
| 4.) Select the Circle with Center through Point, click point A and then click point B to construct a circle with center A and passing through point B. | |
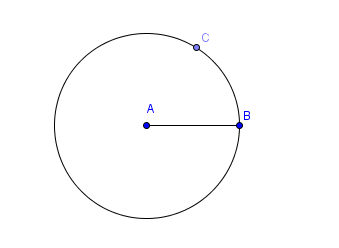
5.) Now, construct point C on the circle by selecting the New Point tool and then clicking the circumference of the circle. Your drawing should look like Figure 1. |
|
| 6.) Now using the Segment between Two Points tool, construct radius AC. | |
| 7.) To construct a line parallel to AB and passing through C, select the Parallel Line tool, select segment AB (select the line segment, not the endpoints), and then select point C. Now construct a line that is parallel to AC and passing through point B. | |
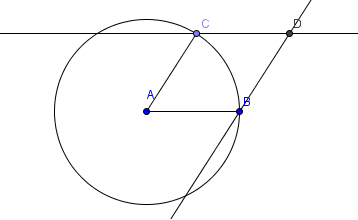
8.) Now, we will intersect the two lines. To do this, select the Intersect Two Objects tool, and then click the intersection of the two lines. After this step, your drawing should look like the Figure 2. |
|
| 9.) We will now hide the circle, and the two lines. To do this, right click each these objects, and then select the Show Object option from the context menu. | |
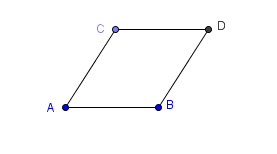
| 10.) To complete the rhombus, use the Segment Between Two Points tool to connect points C and D and to connect points B and C and we are done. |
Exercise: Construct a rhombus without using the circle tool.