Geometer’s Sketchpad Essentials 8 – Rotating Geometric Objects
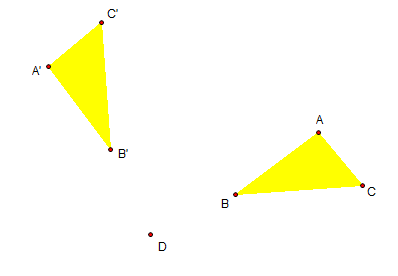
This is the eighth tutorial in the Geometer’s Sketchpad Essentials Series. In this post we are going to learn the Rotate command. First we are going to create a triangle and name it ABC, create a center of rotation point D, and then rotate a triangle 90 degrees.
 The output of this tutorial is shown in the first figure.
1.) Using the Point tool, construct three points.
2.) Highlight the three points, click the Display menu from the menu bar, and then click the Show Labels.
3.) With the three points still selected, click Triangle Interior from the Construct menu.
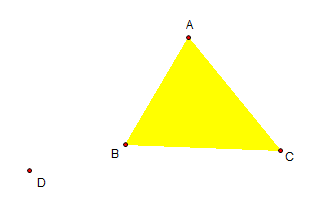
4.) Now, use the Point tool to construct point D outside the triangle interior. After step 4, your drawing should look like the figure below.
 5.) Next, we mark D as our center of rotation. To do this, select point D, click the Transform menu, and the click Mark Center.
6.) Now, to rotate triangle ABC, be sure that only the polygon and the three points are selected. Next, click the Transform menu, and then click Rotate
7.) In the Rotate dialog box (see Figure below), leave the value as is (90.0 degrees) and click the Rotate button.
8.) Display the labels of the image of the rotated triangle. The label should be A‘B‘C‘.
9.) Now move the points A, B, and C. What do you observe? What can you say about the three vertices of the rotated triangle in relation to D?
10.) Save your file.
Exercise: Use point A as the center of rotation and rotate the triangle by 270 degrees.
