GeoGebra Tutorial 29 – Animation, Roses and Radian
This is the 29th GeoGebra tutorial of the GeoGebra Intermediate Tutorial Series. If this is your first time to use GeoGebra, you might want to read the GeoGebra Essentials Series.
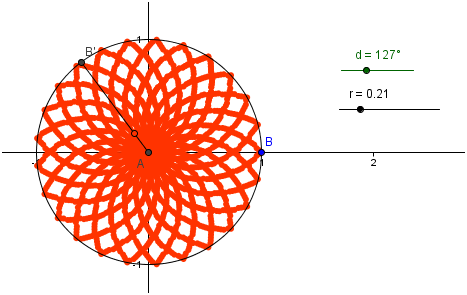
In this tutorial, we learn the concept of radian. One radian is equal to the subtended angle of the arc with the same length as the circle’s radius. In this tutorial, we rotate radius AB’ about point A, the center of the circle. As the point rotates, point C goes back and forth from A to B’ at the same speed. The path of point C forms petals (see red petals in the figures below). The ratio of the maximum number of petals formed and the number of rotations is a good approximation of
 Instructions
If you want to follow this tutorial step-by-step, you can open the GeoGebra window in your browser by clicking here. The output applet of this tutorial can be viewed here.
| 1. Open GeoGebra and select Algebra & Graphics from the Perspectives menu. | |
| 2. To automatically label the new points and not all the other objects click Option>Labeling>New Points Only from the menu bar. | |
| 3. First, we construct the center of the fixed unit circle. Select the Intersect Two Objects tool, click the x-axis and click the y-axis. This will produce point A on the origin. | |
| 4. To construct a circle with center A and radius 1, type circle[A,1], then press the ENTER key. | |
| 5. Next, to construct point B on (1,0), type B = (1,0) in the Input Bar, then press the ENTER key. | |
| 6. Next, we construct an Angle slider that will rotate point B about A. To do this, select the Slider tool, then click a vacant space on the Graphics view to display the Slider dialog box. | |
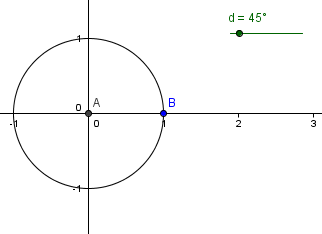
7. In the Slider dialog box, select the Angle button, and type d as the angle name (you may use Greek letters if you want), leave the other values as is, and then click the Apply button. Your drawing should look like Figure 1.
 Figure 1 |
|
| 8. Next, we rotate point B about A, d degrees counterclockwise. To do this, select Rotate Object around Point by Angle, click point B, and click point A to display the Rotate Object around Point by Angle dialog box. | |
| 9. In the Rotate Object around Point by Angle dialog box, replace the measure angle with d in the Angle text box, select counter clockwise button, then click the OK button. This will produce B’. | |
| 10. Move the slider. Point B’ should move along the circle as the value of d changes. What do you observe? | |
| 11. Now, using the Segment between two Points tool, construct AB’. | |
| 12. Next, we construct another slider that will determine the radius of another circle with center at the origin. We will use the intersection of this circle and AB’ as the moving point. To do this, select the Slider tool and click a vacant space in the Graphics view to display the Slider dialog box. | |
| 13. In the Slider dialog box, select the Number option and type r in the name box, change the min to 0, max value to 1, and increment value to 0.01. Select the Animation tab, then change the speed to 2*pi, select Increasing from the Repeat drop drop down list box, and then click the Apply button. | |
| 14. Now, to construct a circle with center A and radius r, type circle[A,r] in the Input Bar and press the ENTER key on your keyboard. | |
|
|
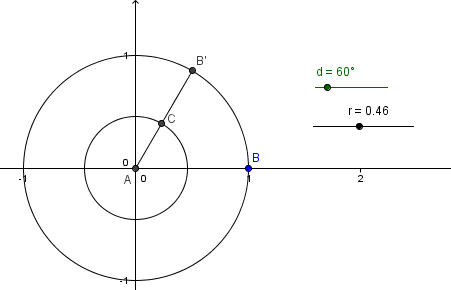
15. To determine the intersection of the new circle and segment AB’, select the Intersect Two Objects, select the new circle and then select segment AB’. This will produce point C as shown in Figure 2.
 Figure 2
|
| 16. Next, we change the color of point C and show its trace. To do this, right click point C and choose Object Properties from the context menu to display the Preferences window. | |
| 17. In the Preferences window, select the Basic tab and check the Show Trace check box. To change the color, select the Color tab, and select the red (or any color you want) from the color palette. Next, close the window. | |
| 18. We now turn on the animation of the two sliders. To do this, right click each slider and select Animation on from the context menu. This will rotate B’ about the circle and move point C along AB’. | |
| 19. Now Pause the animation by click the button located at the lower-left corner of the Graphics view. | |
| 20. Hide the moving circle by right clicking it and selecting Show Object on the context menu. | |
|
|
21. Now, using the Move tool, and set both d and r to 0. |
| 22. To delete the trace paths, select the Move Graphics View and move the workspace dragging the Graphics view. | |
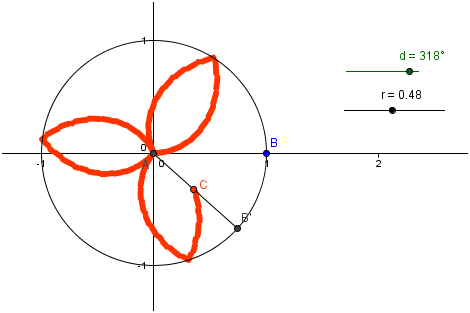
23. To animate, select the Play button at the lower left of your Graphics. The initial rotation of the point should look like Figure 3.
 Figure 3 |