WordPress Blogging Tutorial 2 – Typing Your First Blog Draft
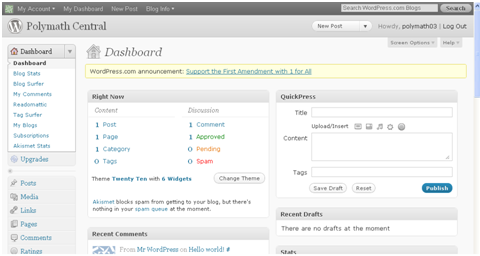
Before we post our first blog, let us first familiarize ourselves with the environment of WordPress. The Dashboard (Figure 1) is the environment where we will always work . The Right Now panel contains the number of Posts, Pages, Categories, Tags, and Themes. The QuickPress panel will enable us to publish short posts quickly.
Below the window are different panels: Recent Comments, Recent Drafts, Stats and others. Do not be overwhelmed by these panels; we will use each of them as we go on. For now, we will concentrate on the basics. Try to familiarize yourself with the environment.
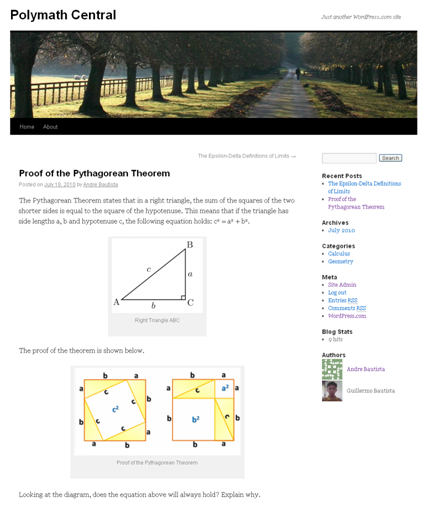
In our first post, we will copy the post Proof of the Pythagorean Theorem in my cousin’s blog Polymath Central (Figure 2). As we can see, we will need the two pictures of right triangles. You can go to the blog and download them before proceeding. Those pictures came from one of my posts; you are permitted to use them in your blog for the sake of this tutorial. Of course, you can create your own first blog if you wish.
In doing the tutorial, we will learn the following:
- Add a New Post
- Add an Image.
- Save our blog as Draft
Step-by-Step Instructions
1. To post a new blog, click the New Post link located at the upper left (or select New Post, then select Draft drop down button located at the upper right) of your WordPress window. This will display the Add New Post text box shown in Figure 3.
2. Type the title of your blog, and type the text in the appropriate boxes.
3. To insert the image of the triangle, click the Add Image button.
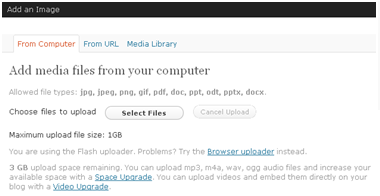
4. This will display the Add an Image window shown in Figure 4. Click the Select Files button and select the right triangle image file from your computer. This will display another window. Note that there are two ways to upload your file, the Flash Uploader shown below and the Browser uploader. The Browser uploader may looks slightly different.
5. In the next window (still Add an Image window), scroll down, and select the Center Alignment, then click Insert Image.
6. Type the additional text, and then select the Save Draft button.
7. You can click the Preview button to see what will your blog look like, but we still have some finishing touches. In the next post, we will discuss Tags, Categories and Posting your first blog.


