The WordPress Blogging Tutorial Series

WordPress is considered by many as one of the best blogging sites and platforms today.  The WordPress Blogging Tutorial series is a series of step by step tutorials on how  to blog in WordPress.com. This tutorial is dedicated to absolute beginners, so it is easy to follow.
The WordPress Blogging Tutorial Series
  1. Introduction to the WordPress Blogging Tutorial Series. An introduction why you should read this tutorial series.
  2. WordPress Blogging Tutorial 1 – Registering a WordPress Blog. A step-by-step guide on how to register a WordPress blog.
  3. WordPress Blogging Tutorial 2 – Typing Your First Blog Draft. This will familiarize you with the WordPress Dashboard environment and a tutorial about creating  a first post.  This includes adding a new post, inserting an image, and saving your post as draft.
  4. WordPress Blogging Tutorial 3 – Publishing your First Blog. This tutorial includes is about publishing your post.  It also includes tips on how to use categories and tags.
  5. WordPress Blogging Tutorial 4 – Linking posts to other online documents. A tutorial on how to link posts to other websites, documents and other blogs.
  6. WordPress Blogging Tutorial 5 – Embedding Videos and More. A tutorial on embedding videos and other media on your blog post.
  7. WordPress Blogging Tutorial 6 – Basic Blogging Tips 1. Basic blogging tips for beginners.
  8. WordPress Blogging Tutorial 7 – Changing the Theme of Your Blog. A tutorial on how to change the appearance of your blog.
  9. WordPress Blogging Tutorial 8 – Working with Widgets. A tutorial on how to install widgets and gadgets to you blog.
  10. WordPress Blogging Tutorial 9 – Finishing Touches.  A post on how to modify general settings, what widgets to include, organizing categories and tags, and publicizing and sharing.
I will also create a tutorial on how to blog using Blogger.

WordPress Blogging Tutorial 8 – Working with Widgets

A widget is a web tool that performs a specific task. It can be a clock, a daily weather news, a random quotation generator, and many others. Widgets can usually be embedded in blogs using a short code. It can be a simple HTML, a Javascript, a flash animation, or any reusable code.

The Clustermap widget located at the bottom right of Mathematics and Multimedia page is an example of a widget.  The Clustermap reveals the location of the visitors. The code of the Clustermap for Mathematics and Mutlimedia is shown below.

<a id=”clustrMapsLink” href=”http://www3.clustrmaps.com/counter/maps.php?url=http://mathandmultimedia.com/”><img style=”border:0;” title=”Locations of visitors to this page” src=”http://www3.clustrmaps.com/counter/index2.php?url=http://mathandmultimedia.com/” alt=”Locations of visitors to this page” /></a>

Some widgets are just codes that you can directly copy and paste to your website, while there are others, like Clustermap, where you have to register your website or blog first, before you will be given the widget code.

Widgets in WordPress

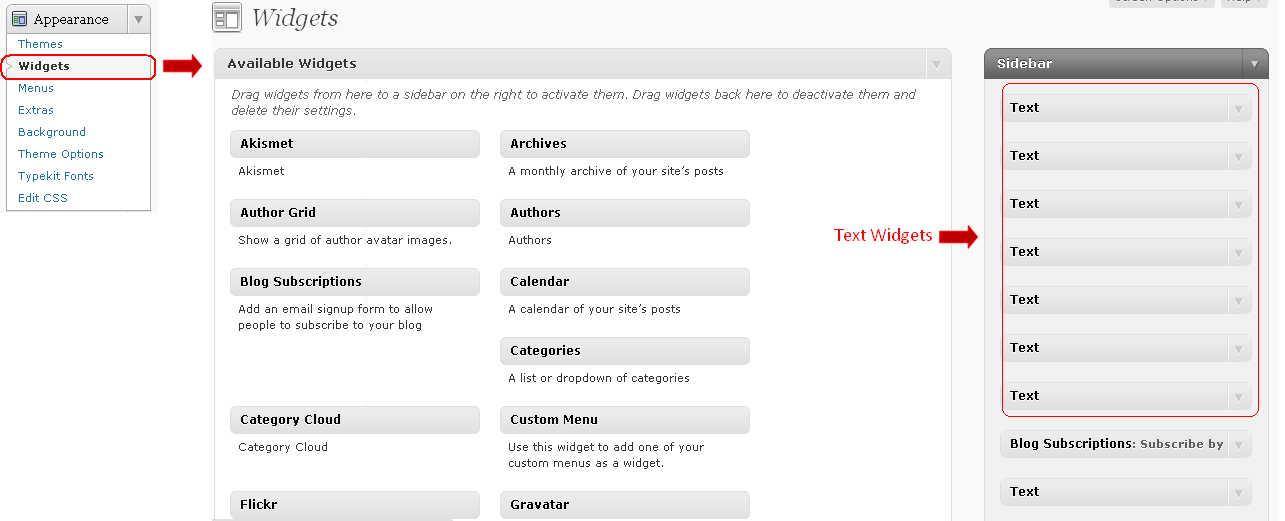
To embed a widget in WordPress, go to your Dashboard and select Widget from the Appearance panel.  You will see a list of available widgets. Drag the widgets of your choice to your side bar. Non-Wordpress widgets can be embedded using the Text widget.  Drag the text widget to your side bar, click the text widget, and then paste the widget code.
 

Another reminder is that some websites or blog sites (e.g. WordPress.com) do not allow Javascript (and other scripts) widget codes for security purposes.

Here are some websites where you can get widgets:

  1. Google Tools
  2. Blogger Plugins
  3. 25 Great Blogger Widgets

WordPress Tutorial 7 – Changing the Theme of Your Blog

From the previous tutorials, we have learned the basics on creating and editing blogs.  In this short tutorial, we are going to learn how to change the theme of your blog.  The theme composed of the general appearance of your blog including the header picture, the color, menus, widgets,  font, background, etc.

To change theme of your blog, do the following:

  1. Log in to your WordPress account.
  2. Go to your Dashboard.
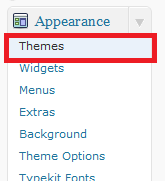
  3. Expand the Appearance panel located at the lower left side of your Dashboard window  and then select Themes (see first figure).
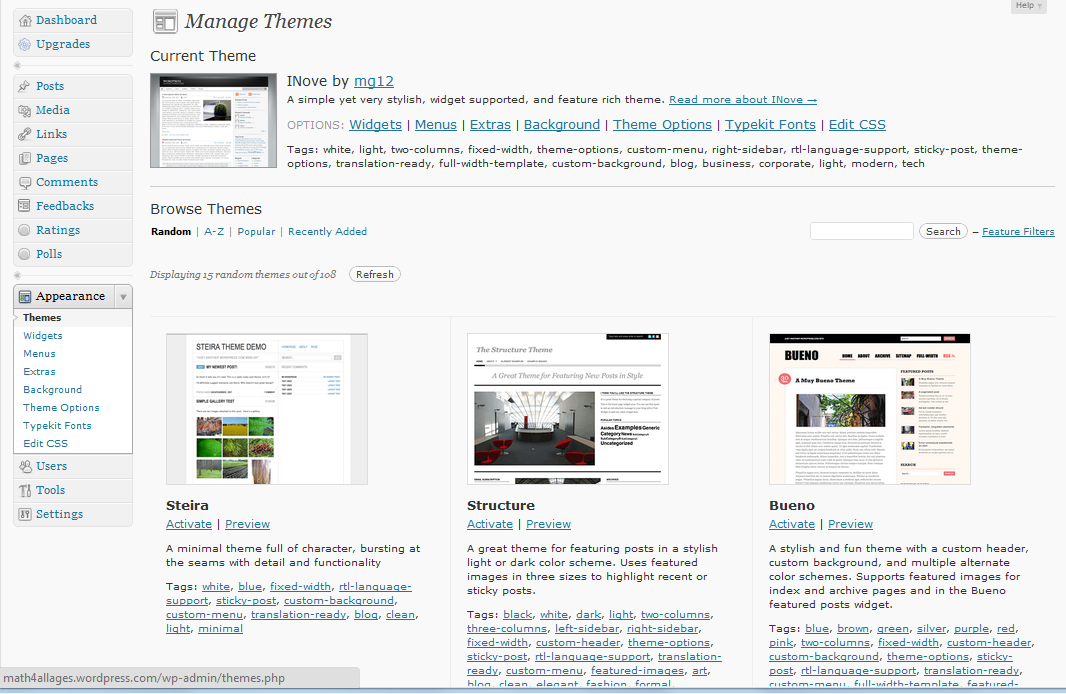
  4. This will display the different themes as shown in the second figure.
  5. You can choose your own theme later, but for the sake of this tutorial series, try to choose first the Inove theme which I am using. You can search for in in the Search box.
  6. When you have found the Inove Theme, press the Activate link.
  7. Now, try to play with different themes, and choose what is suited for your blog. Each theme has its own characteristic. In later tutorials, however, you will be requested to switch back to Inove, so that you can follow the tutorials easily.
1 2