Geometer’s Sketchpad Tutorial 1: Constructing an Equilateral Triangle
In this tutorial, we will use the Geometer’s Sketchpad to mimic the compass and straightedge construction tool we use in elementary geometry. Geometer’s Sketchpad is a proprietary interactive geometry software developed by Key Curriculum Press.
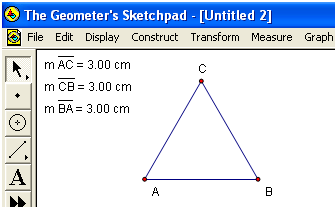
The idea in constructing an equilateral triangle is to use the centers of two circles and one of their intersections as vertices of the triangle (see Figure 6). First, we construct a circle with center A passing through B, then construct a circle with center B and passing through point A, and then determine their intersections. Next, we hide all the unnecessary objects and connect the three points with segments. The final output of the tutorial is shown in Figure 1.
In constructing our triangle, we will learn the following:
- select, deselect and move objects
- construct objects such as circles and segments
- display the label of objects
- hide objects
- display the measure of segments
- construct points of intersection of two objects
Construction Steps
1.) Click the circle tool, determine the center by clicking a location on the drawing pad, move the mouse to determine the radius, and click another location to draw the circle. If you made a mistake, just click the Edit menu and choose Undo from the list.
2.) Click the arrow selection tool and try to drag the two points. What do you observe?
3.) We now show the label of the two points. Click the two points, then click the Display menu from the menu bar, then click Show labels from the drop-down menu. Notice that Geometer’s Sketchpad names the objects in alphabetical order, the center of the circle is named A and the point on the circle is named B.
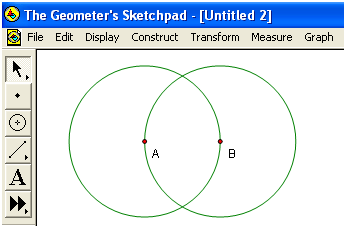
4.) To construct a circle with center point B and passing through A, click the compass tool, click point B and click point A. Your drawing should look like the one shown in Figure 4.
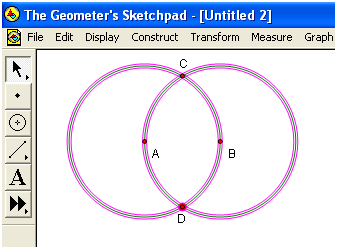
5.) Next, we construct the intersections of two circles. Click the selection arrow tool, click then select the two circles. (Be sure that only the two circles are selected. To deselect an object, click anywhere on the drawing pad).
6.) To construct the intersection, click Construct from the menu bar, then Intersections from the drop-down menu bar.
7.) Display the name of the two intersections by clicking both of them and clicking Show labels from the Display menu.
8.) Next, we hide the two circles and point D leaving only points A, B and C on the drawing area. To do this click the selection arrow tool, click the two circles and point D.
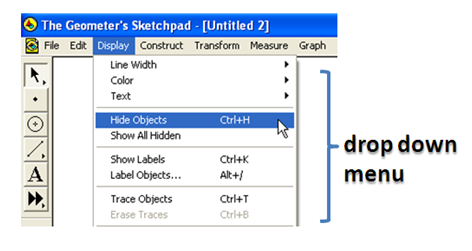
9.) To hide the selected objects, click the Display menu and choose Hide Objects. Notice that the only left objects on the drawing area are points A, B and C.
10.) Select segment tool (be sure that you choose the segment tool, not the ray tool or line tool) from the straightedge tool, then connect the three points to form triangle ABC. Using the selection arrow tool, move the points on the vertices of the triangle.
- What do you observe?
- What kind of triangle is triangle ABC? Why do you say so?
11.) Let us try to see if your conjecture about triangle ABC is true. We will display the length of the segments. To do this, select one of the sides of the triangle, click Measure from the menu bar and choose Length from the drop-down menu.
- Measure the other two sides. What do you observe?
- Move the vertices of the triangle. Is your observation still true?
- Explain why triangle ABC is always an equilateral triangle.
12.) If you want to save your file, click the File menu from the menu bar and click Save from the drop-down menu.
13.) Type the file name of your first sketch, choose a location to save, then click Save.
I also created a similar tutorial on creating an equilateral triangle but using GeoGebra. If you are interested, click here.
Congratulations, you just finished your first construction. Click here to go to Geometer’s Sketchpad Tutorial 2.


