Geometer’s Sketchpad Tutorial 2: Constructing the Dancing Triangle
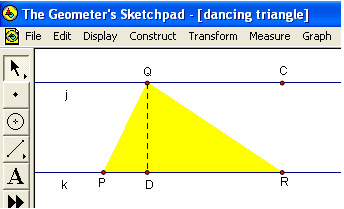
In Geometer’s Sketchpad Tutorial 1, we have learned how to construct an equilateral triangle. In this tutorial, we will explore the relationship of a triangle with a moving vertex on a line parallel to its base. We will construct the drawing shown in Figure 1. In Figure 1, PQR is a triangle, QC is parallel to PR and QD is the altitude of triangle PQR.
What happens if we move Q along QC with points P and R fixed?
In constructing the figure, we will learn the following skills:
- construct perpendicular and parallel lines
- construct interior of a triangle
- measure the distance between two points
- measure the area of a polygon
- measure the length of a segment
- rename objects
Follow the steps below to construct the Dancing Triangle.
Part I: Constructing the Dancing Triangle
1.) Open Geometer’s Sketchpad.
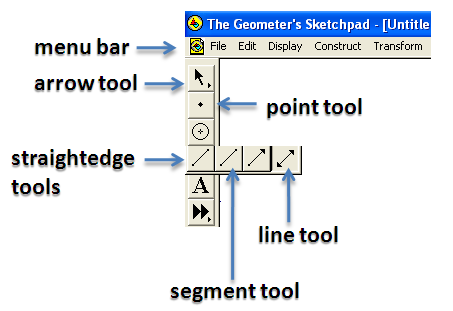
2.) Click the arrow at the straightedge tools and choose line tool.
3.) Click two distinct locations on the drawing area to construct line AB. Notice that Sketchpad names the objects in alphabetical order.
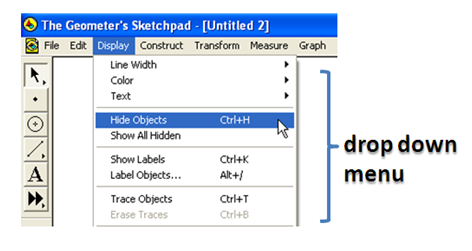
4.)Display the label of the two points by selecting both of them, clicking the Display menu from the menu bar and selecting Show labels from the list. If you have not read tutorial 1, we select an object by clicking the arrow tool and clicking the object. The arrow tool is used in selecting and moving objects.
5.) Next, we change the name of the two points to P and R. To rename point A to Q, select point A, click the Edit menu from the menu bar and click Properties.
Note: Be sure that only point A is selected. If more than one object is selected, click the blank part of the drawing area, then click point A.
6.) In the Properties dialog box, click the Label tab and change the name of A to P as shown in Figure 3 and click the OK button when you are done.
7.) Rename point B to R. You can display the Edit Properties dialog box by right-clicking point B and choosing Properties from the pop-up menu.
8.) Select the point tool, and construct a point on the drawing pad not on line PR.
9.) Display the name of the point. If you have followed correctly, the name of the point should be point C, otherwise you rename it C. (The names of the objects do not really matter much, but we will refer to them later using their names, so it is important that you rename them as instructed).
10.) We construct a line parallel to PR and passing through point C. To do this, select line PR (click the line, not the points), select point C, click the Construct menu and click Parallel line from the list. Move points P, C and R. What do you observe?
11.) We construct a point on the line parallel to PR. To do this, click the line parallel to PR passing through C, and click Point on Parallel line.
12.) Display the label of the fourth point (refer to number 4) and rename it to Q (refer to number 6 or 7). Move point Q and point C. What do you observe? What is the difference between point Q and point C?
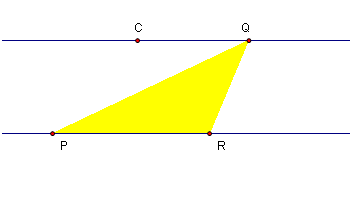
13.) To construct the interior of triangle, select point P, Q and R (be sure that only the three points are selected), then click the Construct menu and click Triangle Interior. Your diagram should look like the one shown in Figure 5. Move point Q. What do you observe about the interior of the triangle?
Part II: Exploring the Properties of the Dancing Triangle
We have finished our construction. Now, we will observe what happens to the area of the triangle if we move point Q along the line parallel to PR.
14.) To display the area of the triangle, click the interior of the triangle, click the Measure menu, then click Area. Notice that a text containing the area of PQR appeared at the left corner of your drawing area.
15.) Move point Q. What do you observe? Can you think of the reason why your observation is such?
16.) The area of a triangle is the product of its base and its altitude. So, let us see what happens to the length of the base and the altitude when we move point Q. To display the length of the base we just have to find the distance between P and R. To do this, click points P and R, click the Measure menu and click Distance.
17.) Move point Q. What can you say about the measure of the base of the triangle?
18.) Next, we construct the altitude of triangle PQR. Since the altitude of the is perpendicular to its base, we must construct a segment perpendicular to PR and passing through Q. To do this, click line PR (not the points), select point Q, then click the Construct menu and select Perpendicular Line form the list.
19.) Next, we construct the intersection of PR and the line perpendicular to it. To do this, select line PR (not the points), click the line perpendicular to PR, then click the Construct menu and click Intersection form the list.
20.) Display the label of the intersection point. Its name should be D.
21.) We hide the line QD, but leaving points Q and D. To do this, right click line QD (not the points), then click Hide Perpendicular Lines, then select the segment tool, click point Q and click point D.
22.) To turn altitude QD to a dashed line, right click it and choose Dashed from the pop-up menu.
23.) Our last step is to display the length of QD. To do this, select segment QD (not the points), click the Measure menu, then click Length.
24.) Now move the points on the drawing. What do you observe?
25.) Move point Q along the line. What do you observe?
26.) Explain why the area of the triangle is constant when you move point Q.
In the Geometer’s Sketchpad Tutorial 3, we are going to learn how to construct graphs and sliders.
