Geonext Tutorial 2 – Constructing a Square

In Geonext Tutorial 1, we used the circle and polygon tools to construct an equilateral triangle.  In this tutorial, we are going to use the circle, the parallel and the perpendicular line tools to construct square ABEC shown in Figure 1.

Figure 1 - Square formed by construction using circles, parallel and perpendicular line tool.

In constructing our square, we will first construct the a circle with radius AB, construct a line perpendicular to AB, passing through point A (see line CD), construct a line parallel to CD passing through point B (see line EB), then construct a line parallel to AB and passing through C (see line CE). We then hide all the objects except the vertices of the square and line segment AB, and use the segment tool to construct square ABEC. Follow the instructions below to construct the square.

Instructions

1. Open Geonext. Click the New Board button.
2. To construct a circle with center A passing through point B, click the Circle tool, click the drawing board to determine the center of the circle, then click another location to determine its radius. Notice that Geonext, automatically names the points in alphabetical order.


3. Double click the Straight Line icon to display the list of tools. Choose Line segment tool. Observe that the Straight Line tool icon on the toolbar is replaced by the Line Segment icon.  Click point A and then click point B to construct radius AB.

Figure 2 - Tools that appear when you double click the Straight line tool in the toolbar.

4. To construct a line perpendicular to AB passing through point A, double click the Line Segment tool to display the related tools. Choose the Perpendicular line tool, click segment AB, then click point A.
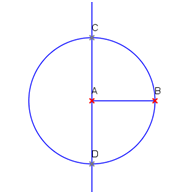
5. Next we construct the intersection of the line constructed in step 4 and the circle. To do this, click the Point tool, then click one of the intersections. Observe that Geonext automatically names the point C and the opposite point D. After step 5, your drawing should look like Figure 3.

Figure 3 - The appearnce of the drawing after step 5.

6. We now construct a line parallel to CD and passing through point B. To do this, double click the Perpendicular line tool to display the list of related tools, and choose Parallel line. Click line CD (not the points), then click point B.
7. Applying step 6, construct a line parallel to AB and passing through point C.

8. Using the Point tool, draw the intersection the line parallel to AB, and the line perpendicular to AB passing through point B. Geonext will name this point E.
9. Next we hide all the objects except the vertices square ABEC and segment AB. To hide the objects, double click the Rename tool (located at the bottom of the toolbar), and choose Hide. Click all the objects except points A, B, C, E and line AB. Notice that all the clicked objects change colors. These are the hidden objects.
10.  Click the Move tool and move the vertices of the square. What do you observe?
11.  Using the Line segment tool, construct segments AC, CE and BE and we are done.

12.  Move the vertices of the square. What do you observe?
Exercises:

  1. Verify that the figure is a square using the angle tool and by revealing the length of the sides (Refer to Tutorial 1).
  2. Based on the construction above, prove that ABEC is a square.

Is there an SSA Congruence?

In the Triangle Congruence post, we discussed about ways to test if two triangles are congruent. The only theorems (or sometimes called postulates) that hold are the SSS, SAS and ASA congruence. We ended our discussion with the question about the AAS (or SAA), AAA and SSA (or ASS) congruence.

Let us try to explore the AAS case.  If we have two triangles (see first pair of in Figure 1), and two pairs of their angles (denoted by the blue and red circles) are congruent the third pair of angles (denoted by the yellow circles in the second pair) are also congruent. Hence, a pair of sides (both included in two pairs of congruent angles) are congruent, which is similar to the ASA congruence. Therefore AAS congruence holds and is equivalent to ASA congruence.

Figure 1 – AAS and ASA congruence postulates are equivalent.

In Figure 2, shown are triangles with three pairs of angles that are congruent. It is clear that the two triangles are not congruent. Therefore, AAA congruence does not hold.

Figure 2 – Triangles having three pairs of congruent angles.

Now, let us try the SSA congruence. Figure 3-A shows triangle ABC with sides and angle marked. We extend AC to the right hand side (see Figure 3-B), then rotate BC about point B (see Figure 3-C). We let C’ be the intersection of BC and the extended segment such that BC is congruent to BC’ (see Figure 3-D).
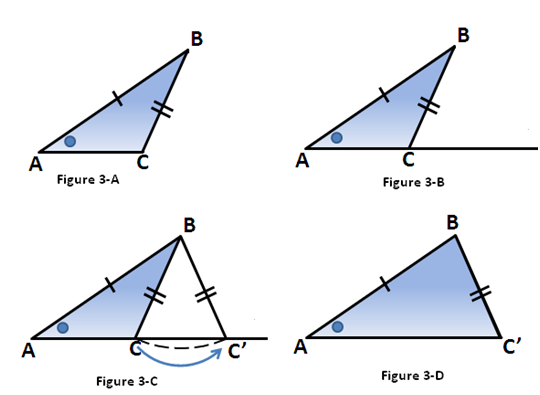
Figure 3 – Triangels having two pairs of sides and a pair of angles which are congruent.

Looking at Figure 3-A and Figure 3-D, two pairs of their sides and a pair of non-included angles are congruent, but the triangles are not congruent. Therefore, SSA (or ASS) congruence does not hold.

Free Whiteboard Software

If you are using computers during lectures, or fond of screencasting, you would probably need a software where you could scribble.  You would need a blackboard or a whiteboard software. There are several free software that you could use – you could use PaintBrush or Flash Player.

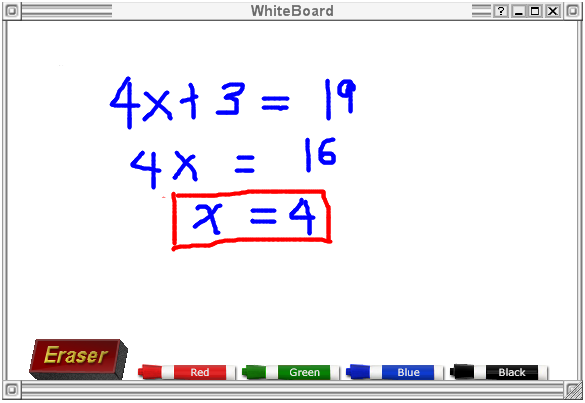
One of my latest internet dig, however, would also be a good choice. It is called  Classic WhiteBoard. It is available in Windows, Linux and Mac platform. Its screenshot is shown below.

What I love about this software is that it is very easy to use (click here to view screencast tutorial) and it really looks like a whiteboard.  It works very much like PaintBrush.  One of the disadvantages, though, is that it has only four colors.

Update: I have uploaded a better whiteboard software added with math tools such as compass, straightedge, triangle and protractor here.

1 56 57 58 59 60 62