This is the third tutorial of the Microsoft Mathematics Tutorial Series. The first tutorial is about the Introduction to the User Interface and the second tutorial is about Peforming Basic Numerical Computation.
Aside from being a scientific calculator, Microsoft Mathematics is also a computer algebra system. It is capable of simplifying or expanding expressions, solving equations and inequalities, and performing other algebraic manipulations. In this post, we discuss some of the most used commands in solving equations and inequalities used in high school mathematics.
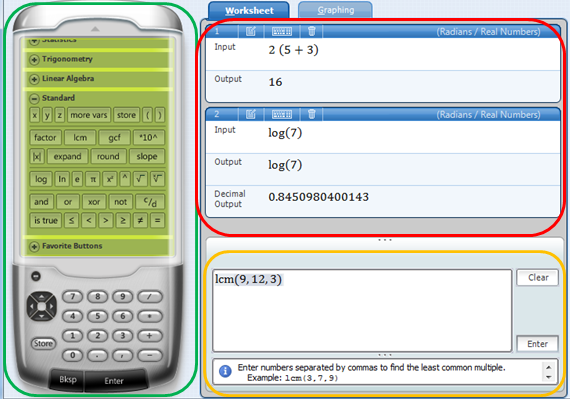
To try the examples below, open Microsoft Mathematics and be sure that you are on the Worksheet tab.
Solving Equations
To solve the equation  , type 2x – 3 = 5 in the Input text box and then press the ENTER/RETURN key on your keyboard. The output of the command is shown below.

Notice that tirst, the input was reformatted to solve (2x – 3 = 5, x) and second, the solution is shown at the bottom. The Solution steps, a link which can be expanded, is also shown. Microsoft Mathematics is capable of generating solution steps with complete explanation to some algebraic problems. Clicking the Solution steps link will show the figure below. » Read more