Enhancing your Geometric Drawings with Google Sketchup

If you would like to enhance your geometric drawings, then Google Sketchup is one software that I would recommend. Google Sketchup is 3-dimensional modeling software designed for architects, engineers, filmmakers and game developers, and other related professionals (Wikipedia).  It is now used to create models in Google Earth.

What makes Google Sketchup advantageous over other 3d software is that  it is a lot easier to use.  Some of the examples below are the figures I created after only watching several of their video tutorials.

Figure 1 shows the model in perspective showing symmetries of a right rectangular prism.
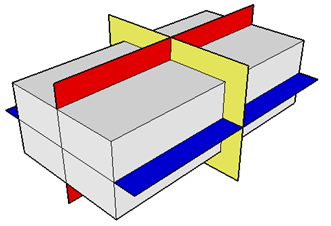
Figure 1 - Symmetries of a right rectangular prism.

Figure 2 shows the painted cube problem my Introduction to the Concept of Functions post. In the diagram, a big cube is painted yellow and cut into smaller cubes. The problem is to investigate the number of painted faces.
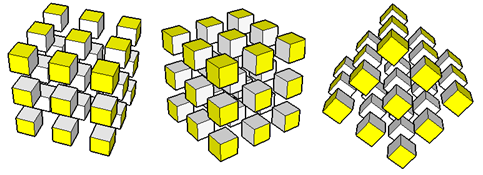
Figure 2 - Cube painted yellow and cut into smaller cubes.

Figure 3 shows different face styles of a cuboctahedron.

Figure 3 - Cuboctahedron in different view types.

Google Sketchup is free, and you can pay if you want a professional version. There are basic, intermediate and advanced video tutorials in its website.

You may also want to read my post on Using Google Sketchup in Teaching Mathematics.

Annotating and Zooming with the ZoomIt Software

ZoomIt software enables you to zoom and draw (or annotate) anywhere on your screen. When I said anywhere, I really mean anywhere. You can draw on your desktop, toolbars, widgets or even icons. The examples below show writings on a Powerpoint slide show and two icons.

Figure 1 – ZoomIt is used to annotate the Powerpoint slide while in Slide Show mode.

The ZoomIt drawings, however, are not permanent. Once you press Esc key, all your Zoomit drawings are erased.  If you want a permanent writing pad, you can use Miscrosoft PaintBrush or Classic Whiteboard.

Figure 2 – ZoomIt can be used to write even on icons.

Once you install ZoomIt, you just have to click its icon and then press the combination key to activate it. By default, Zoomit allows you to draw by pressing the Ctrl+2 (that is, holding the Control key on your keyboard and then pressing 2) and zoom by pressing Ctrl+1.

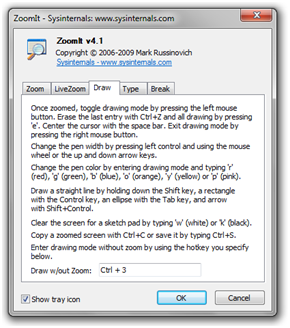
Figure 3 – The ZoomIt dialog box.

You can change the combination keys to activate drawing and zooming. You just have to double click the ZoomIt icon to display the dialog box shown in Figure 3. If you want to change the control keys, you just click the text box (for example, Draw w/o Zoom text box), then press the combinations keys that you want on your keyboard.

Free Whiteboard Software

If you are using computers during lectures, or fond of screencasting, you would probably need a software where you could scribble.  You would need a blackboard or a whiteboard software. There are several free software that you could use – you could use PaintBrush or Flash Player.

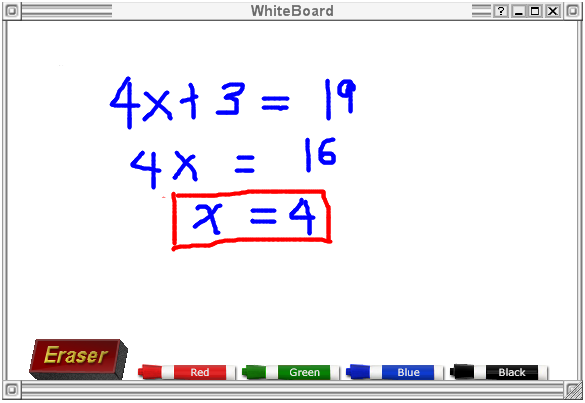
One of my latest internet dig, however, would also be a good choice. It is called  Classic WhiteBoard. It is available in Windows, Linux and Mac platform. Its screenshot is shown below.

What I love about this software is that it is very easy to use (click here to view screencast tutorial) and it really looks like a whiteboard.  It works very much like PaintBrush.  One of the disadvantages, though, is that it has only four colors.

Update: I have uploaded a better whiteboard software added with math tools such as compass, straightedge, triangle and protractor here.

1 27 28 29